Will this print break?
Strength Check adds a stress test to OrcaSlicer. Paint where the part is held and where it gets pushed, type the load in kg, lb or N, and see whether it holds before you spend the filament. It reads the part as it will actually be printed: walls, infill, layer lines and orientation.
Free and open source. Prefer a zip? Windows portable build. Code and docs on GitHub.
Enjoying this free tool?A coffee keeps it free and ad-free.
Buy me a coffee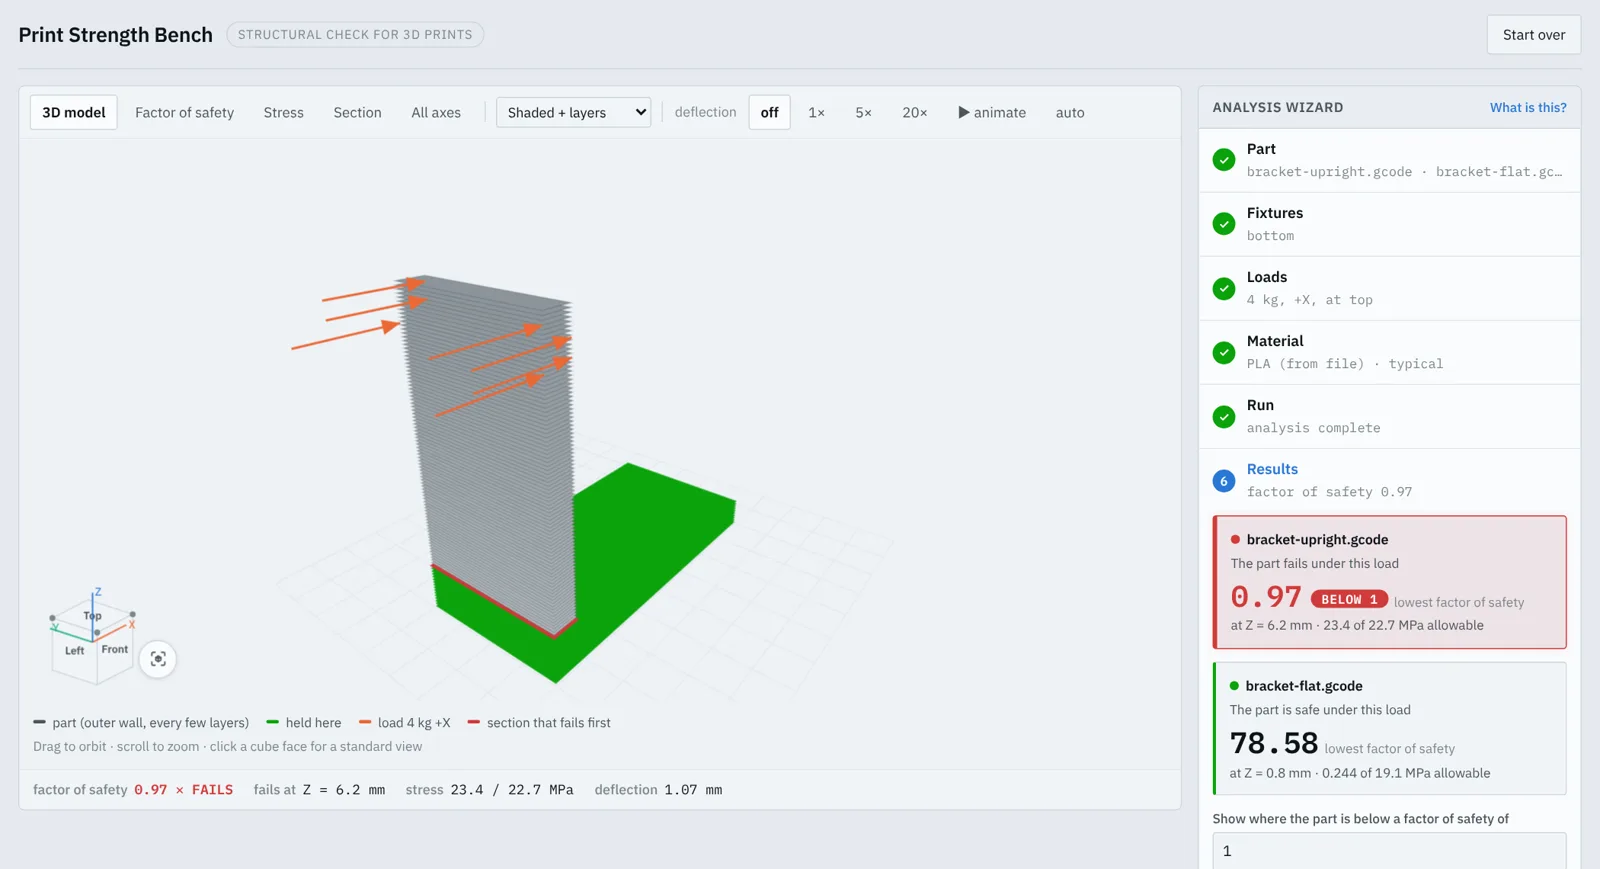
Five steps in OrcaSlicer
Open your model in the Strength Check build of OrcaSlicer, pick your filament and print settings as usual, then:
- 01
 Open Strength check
Select the part and click the Strength check icon in the toolbar on the left of the 3D view, next to the other paint tools.
- 02
Paint the fixture
Paint with the left mouse button where the part is held: the screwed-down base, the clamped end. Switch the tool type to Face to select a whole flat face in one click. Shift erases.
- 03
Paint the load
Paint with the right mouse button where it gets pushed or pulled. Drag the arrow to aim the load; it snaps to the axes, or use the ±X, ±Y and ±Z buttons.
- 04
Ask your question
Choose Check a load and enter it in kg, lb or N to get a safety factor, or choose Maximum load to see how much it takes at a safety factor of 1.5.
- 05
Read the result
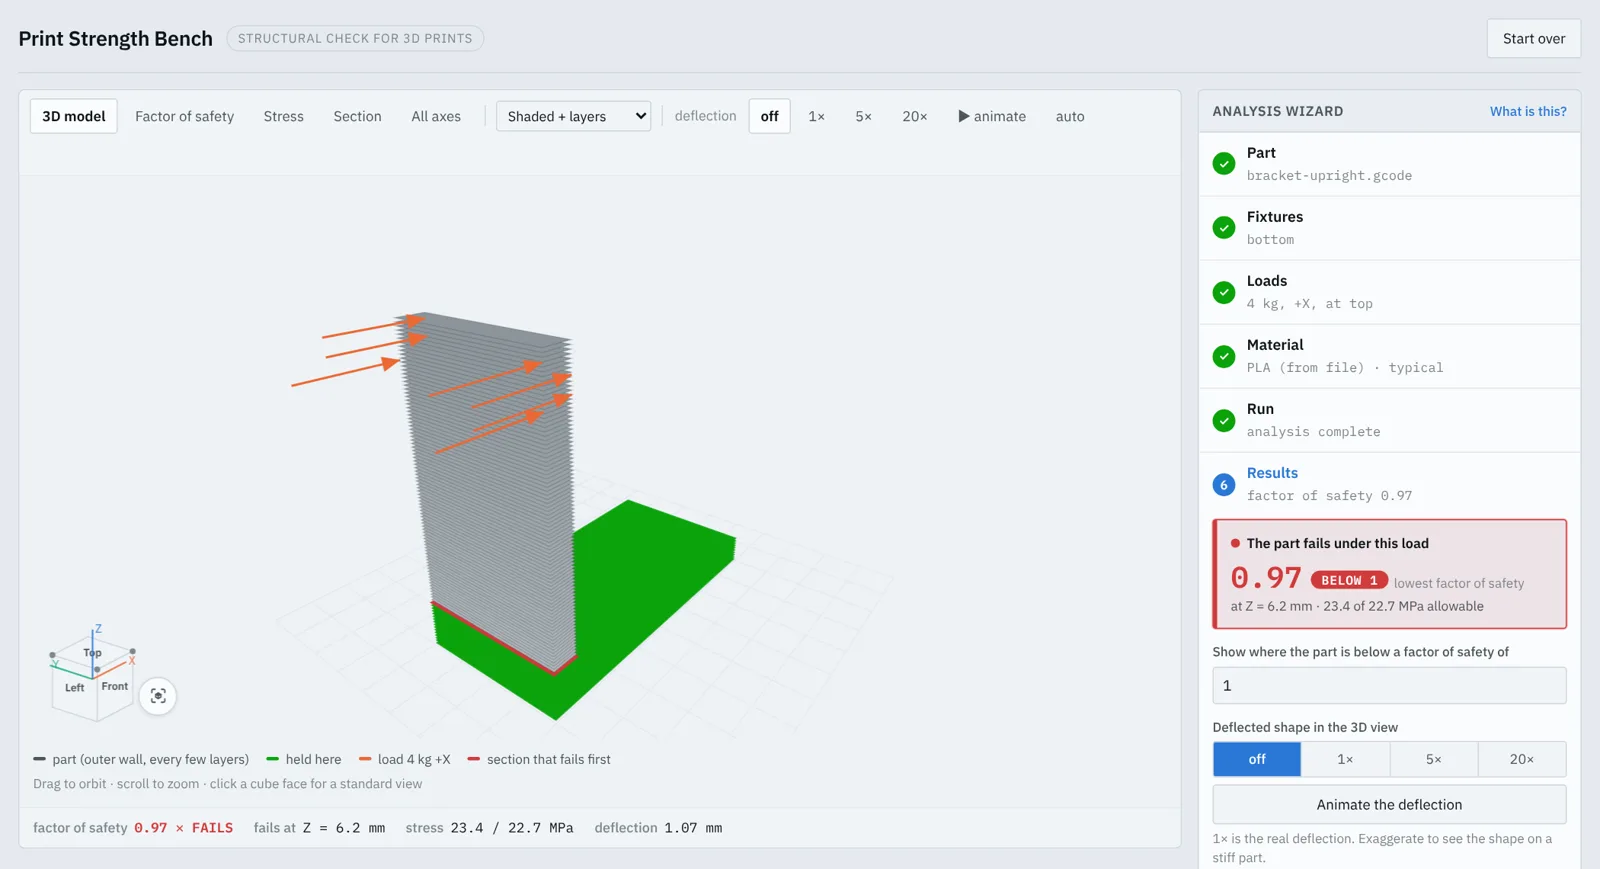
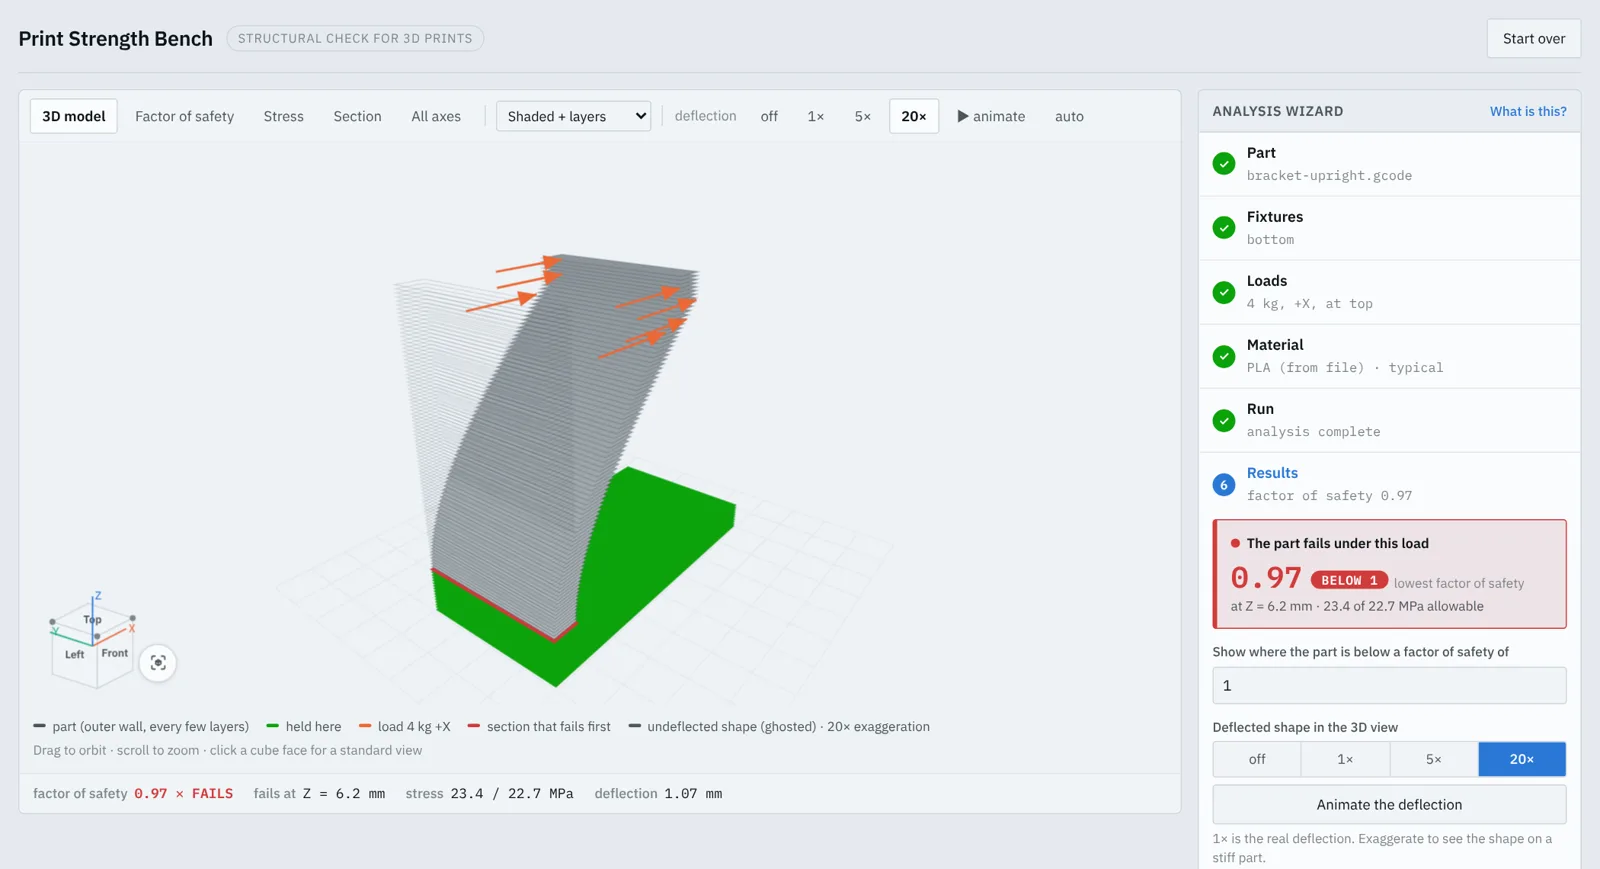
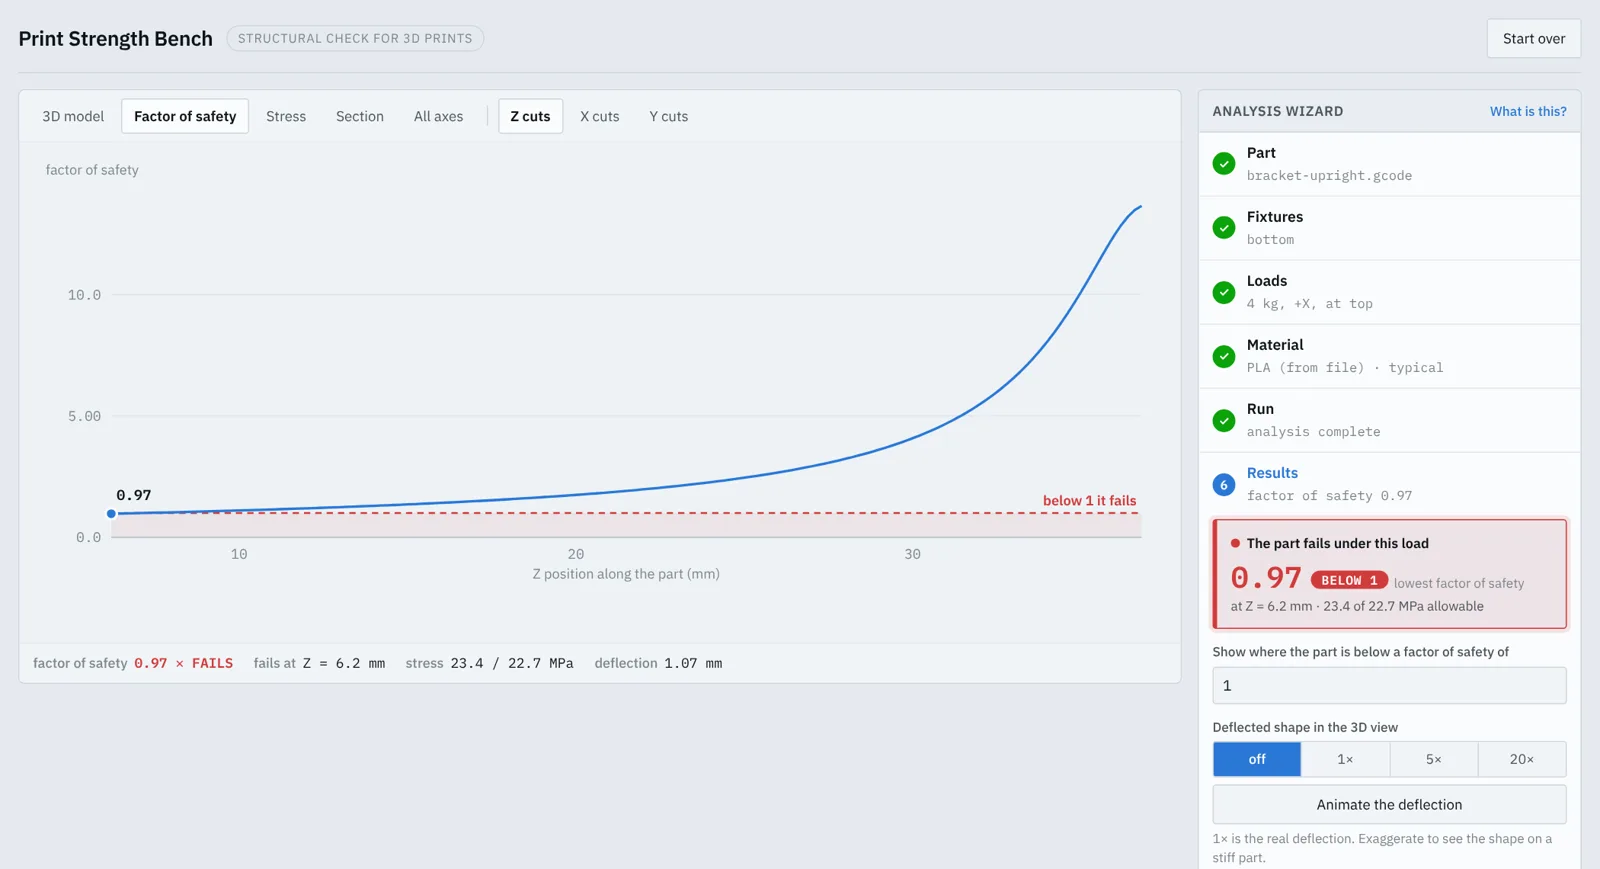
Click Analyze. You get Should hold, Little margin or Will break, the weakest cut, stress colours from blue to red, and the bent shape, animated and exaggerated if you like.
Slice the plate first and the check uses Orca's own sliced layers, so modifiers, per-part settings, variable layer height and solid infill all count. Before slicing it builds the part from your wall, skin and infill settings. The load case is a what-if: it is never saved into your model, G-code or project.
Where it bends, and where it breaks
These are from the browser version, which runs the same analysis on a sliced G-code or STL file.
A fast first answer, not a lab test
- The geometry is exact.Section properties match closed-form results to floating point, and a textbook cantilever agrees within 1%.
- The material is the uncertainty.Layer adhesion varies with temperature, cooling and moisture, so expect about ±30% on absolute numbers.
- Comparisons are reliable.Which orientation, how many walls, more infill or not: ratios between two setups cancel most of the material error.
- It knows printed parts.Weak layer lines, bending, shear, twisting, and stress raised by holes and sharp corners are all checked.
It is beam theory, not FEA, and it does not model fatigue, creep or impact. Don't use it as the only check on anything safety-critical.
First launch
This is a preview build of OrcaSlicer with Strength Check added, and it is not code-signed yet, so your computer will ask once before opening it.
macOS
- Open the .dmg and drag OrcaSlicer to Applications.
- The first time, right-click OrcaSlicer and choose Open, then Open again.
- If macOS still refuses, run
xattr -dr com.apple.quarantine /Applications/OrcaSlicer.appin Terminal.
Windows
- Run the installer.
- If SmartScreen says the app is unrecognised, click More info, then Run anyway.
- Or unzip the portable build and run OrcaSlicer.exe.
It installs as OrcaSlicer and shares settings with a regular OrcaSlicer install, so back up your profiles first if you rely on them. Strength Check has been offered to the OrcaSlicer project, so it may arrive in the regular release.